Hello and welcome to the newest gallery of my blog, 'The Creative Process'. I decided towards the end of 2017 that I wanted to share how I achieve the looks that I do from some, not all, of the photographs I take. The reason for this is that those new to photography tend to over think the set up of each shot, or was that just me? When in fact certain looks can be achieved using very little kit.
When I started out in photography I thought I needed to buy all the kit that I possibly could. I realised very quickly that it wasn't the equipment that made the photographer, it was the photographer themselves and their ability to understand and get the best from the equipment they had. I know this sounds cliche but its the truth.
Whether you are a professional photographer, semi professional or a weekend warrior, I hope you find this section of my blog inspiring and of value.
The first look I'd like to share with you is a self portrait (DISCLAIMER; I'll probably use a lot of self portraits).
Equipment
For this shot I used the following items;
Camera : Nikon D750
Lens : Nikkor 24-120mm at 50mm
Settings : ISO 100 f/11 1/160 sec
Lighting : 2 x Elinchrom D-Lite RX4
Edited Using : Adobe Lightroom cc 2015 and Photoshop cc 2018
Other:
Tripod - 3LeggedThing, Winston
Nikon ML-L3 Remote Controller (camera set to a 2 second delay to allow me time to get in position after hitting the shutter release).
Back drop - Life of Photo rectangular pop up backdrop (black side).
The Set Up.
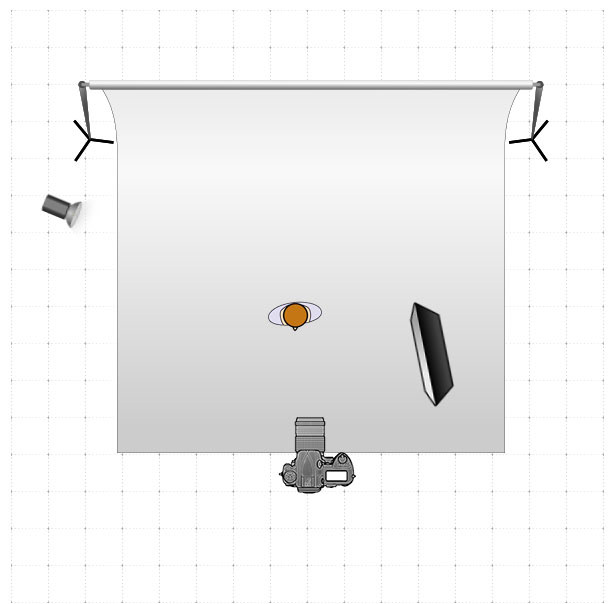
The kick light positioned behind me had a small dish to narrow the direction of the light, where as the main light, or key light, was position in front of and to the side of me, turned away from my face to allow the light to spread across my face without causing the highlights to blow out.
In order to establish focus, I placed one of the lights in front of the camera and focused off of that. Take note of its position and that is where you will stand. There may be times where you may have to adjust the focus slightly, but by using this technique you'll pretty much get it spot most of the time.
Editing Process
To begin with the photo is loaded into Lightroom, where the following adjustments were made;
Temp 5,950
Tint -9
Exposure +0.85
Contrast +21
Highlights -9
Whites -34
Clarity +10
Point Curve : Medium Contrast
Red -4 / Orange -14 / Yellow -18 / Green -24 / Aqua -20 / Blue +6 / Purple +14 / Magenta +7
Dehaze +28
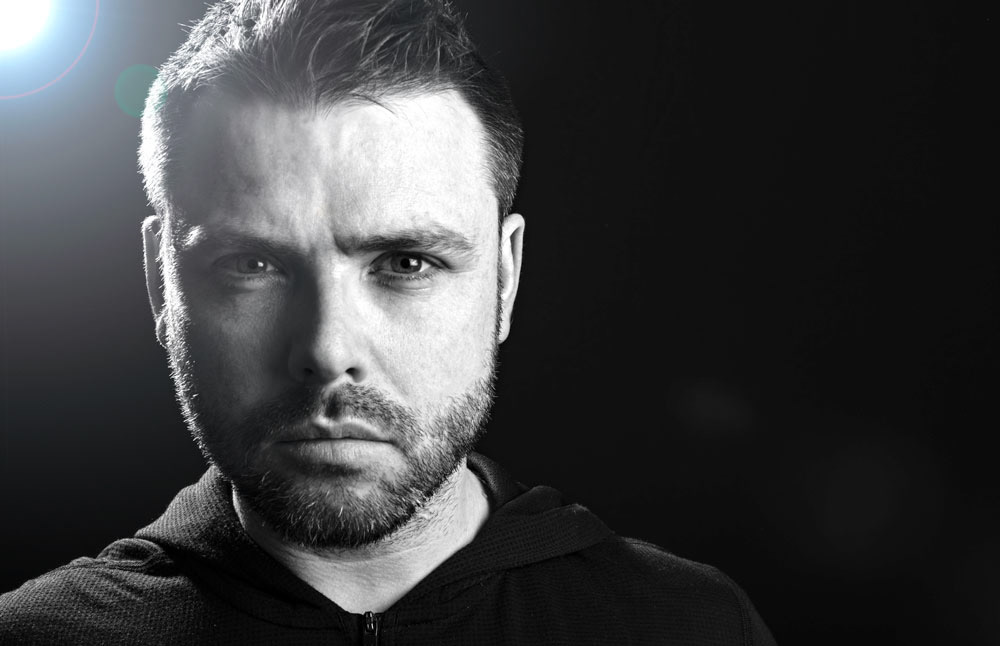
I then converted this to black and white, which resulted in...
This was then opened in photoshop where I used the healing brush to neaten up the stray hairs along the beard line, soften the dark areas underneath the eyes and reduce the blemishes on my forehead. I then increased the exposure again by one stop.
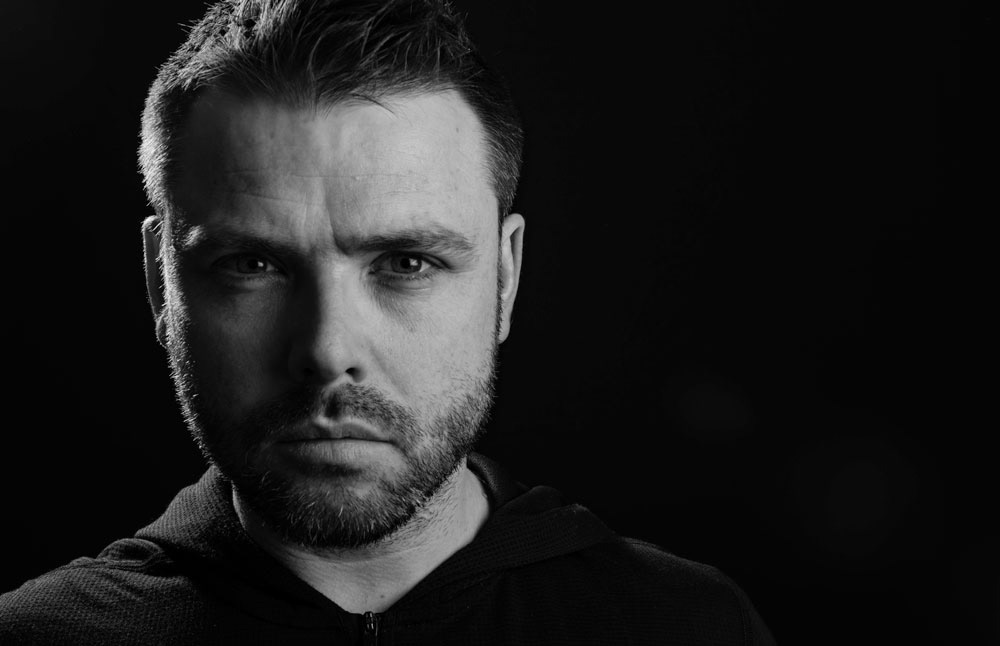
Following this I added a lens flare to the top left hand corner to complete the final image...

I hope you found value in this post. See you soon.
WITHOUT PHOTOGRAPHY, THERE IS NO HISTORY.
e: gary.fernon@photoreceptorcell.co.uk
Resources: